Visible to Intel only — GUID: pqo1512362563969
Ixiasoft
1.1. Acronyms and Definitions
1.2. Recommended System Requirements
1.3. Installation Folders
1.4. Boot Flow Overview
1.5. Getting Started
1.6. Enabling the UEFI DXE Phase and the UEFI Shell
1.7. Using the Network Feature Under the UEFI Shell
1.8. Creating your First UEFI Application
1.9. Using Arm* DS-5* Intel® SoC FPGA Edition (For Windows* Only)
1.10. Pit Stop Utility Guide
1.11. Porting HWLIBs to UEFI Guidelines
1.12. Tera Term Installation
1.13. Minicom Installation
1.14. Win32DiskImager Tool Installation
1.15. TFTPd64 By Ph.Jounin Installation
1.16. Revision History of Intel® Arria® 10 SoC UEFI Boot Loader User Guide
1.5.1. Compiling the Hardware Design
1.5.2. Generating the Boot Loader and Device Tree for UEFI Boot Loader
1.5.3. Building the UEFI Boot Loader
1.5.4. Creating an SD Card Image
1.5.5. Creating a QSPI Image
1.5.6. Booting the Board with SD/MMC
1.5.7. Booting the Board with QSPI
1.5.8. Early I/O Release
1.5.9. Booting Linux* Using the UEFI Boot Loader
1.5.10. Debugging an Example Project
1.5.11. UEFI Boot Loader Customization
1.5.12. Enabling Checksum for the FPGA Image
1.5.13. NAND Bad Block Management
Visible to Intel only — GUID: pqo1512362563969
Ixiasoft
1.5.12.2. Generate mkimage
- Type the following command to convert the file.
$ quartus/bin/quartus_cpf -c --hps -o bitstream_compression=on
<your_working_directory>/a10_soc_devkit_ghrd/output_files/ghrd_10as066n2.sof
<your_working_directory>/a10_soc_devkit_ghrd/output_files/ghrd_10as066n2.rbf
This command creates the following files in the <your_working_directory>/a10_soc_devkit_ghrd/output_files/ folder:Table 14. Resultant RBF File Output File Description ~ /a10_soc_devkit_ghrd/output_files/ghrd_10as066n2.periph.rbf I/O ring configuration file ~ /a10_soc_devkit_ghrd/output_files/ghrd_10as066n2.core.rbf FPGA fabric configuration file - Type the following command to add the mkimage header to ghrd_10as066n2.periph.rbf:
$ mkimage -A arm -T firmware -C none -O u-boot -a 0 -e 0 -n "RBF" -d ghrd_10as066n2.periph.rbf ghrd_10as066n2.periph.rbf.mkimage - Type the following command to add the mkimage header to the ghrd_10as066n2.core.rbf:
$ mkimage -A arm -T firmware -C none -O u-boot -a 0 -e 0 -n "RBF" -d ghrd_10as066n2.core.rbf ghrd_10as066n2.core.rbf.mkimageThe following files are now in your <your_working_directory>/a10_soc_devkit_ghrd/output_files/ folder:Figure 118. Resultant mkimage Files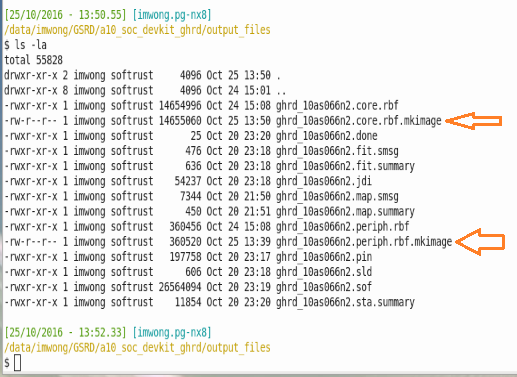
- Create the SD Card image with the PEI.ROM, ghrd_10as066n2.periph.rbf.mkimage, and ghrd_10as066n2.core.rbf.mkimage.
- Download the make_sdimage.py tool from here.
Note:To obtain more information about the make_sdimage.py tool, please run the tool with the -h option:
$ ./make_sdimage.py -h - Create a new folder and cd to it. Copy the required files that are listed in the table below into the current folder.
Table 15. Required Files for the make_sdimage.py Tool File Description ~/uefi-socfpga/Build/PEI.ROM UEFI boot loader image ~/uefi-socfpga/Build/DXE.ROM Optional second phase of UEFI boot loader image when you want to boot to UEFI Shell ~/a10_soc_devkit_ghrd/output_files/ghrd_10as066n2.core.rbf.mkimage Compressed FPGA configuration file ~/a10_soc_devkit_ghrd/output_files/ghrd_10as066n2.periph.rbf.mkimage Compressed FPGA I/O configuration file <SoCEDS_installation_directory>/embeddedsw/socfpga/prebuilt_images/ socfpga_arria10.dtb Linux Device Tree Blob <SoCEDS_installation_directory>/embeddedsw/socfpga/prebuilt_images/zImage Compressed Linux kernel image <SoCEDS_installation_directory>/embeddedsw/socfpga/prebuilt_images/angstrom-rootfs.tar.gz Root filesystem as a compressed tarball
- Download the make_sdimage.py tool from here.
- Create the root filesystem for the SD card image.
$ mkdir rootfs $ cd rootfs $ sudo tar xzf ../angstrom-rootfs.tar.gz . - Call the make_sdimage.py script by typing the following:
$ cd ../ $ sudo ./make_sdimage.py -f -P PEI.ROM,num=3,format=raw,size=10M,type=A2 -P rootfs/*,num=2,format=ext3,size=1500M -P zImage,DXE.ROM,ghrd_10as066n2.core.rbf.mkimage,ghrd_10as066n2.periph.rbf.mkimage,socfpga_arria10.dtb,num=1,format=fat32,size=500M -s 2G -n sd_card_image_a10_uefi.img - Power on the board with the above SD image. If the image is corrupt, the error message "FPGA: Bad Data Checksum" appears.