Run a Sample Project with Eclipse*
Intel® IoT Toolkit
NOTE:
If you are using Eclipse* with FPGA see the FPGA Workflows on Third-Party IDEs for Intel® oneAPI Toolkits.
Starting with the 2021.3 release of the Intel® IoT Toolkit, the Eclipse IDE for C/C++ Developers (Eclipse CDT) package will no longer be bundled with the Intel® IoT Toolkit. Plug-ins to support Intel® oneAPI development in Eclipse will continue to be provided for integration into a user-provided copy of the Eclipse IDE for C/C++ Developers either during or after installation of the Intel® IoT Toolkit.
The plug-ins support the past two Eclipse versions that were released as of one month before the toolkit was released. For example, the 2021.2 version toolkits supported Eclipse CDT versions 2020-09 and 2020-12.
The latest version of the Eclipse IDE for C/C++ Developers install package is available at https://www.eclipse.org/downloads/packages/.
Building a Project Using Eclipse* IDE
You can access the entire suite using Eclipse* (see the release notes for minimum required version).
NOTE:
An internet connection is required to download the samples for oneAPI toolkits. For information on how to use this toolkit offline, see Developing with Offline Systems in the Troubleshooting section.
NOTE:
To use the compilers installed with the Intel® IoT Toolkit, you must set up your environment by sourcing the setvars script or by loading a module file before launching the Eclipse* IDE workspace. The Intel oneAPI Samples plugin creates individual projects from an existing code samples and uses the CMake build system. You can specify the compiler executable used by changing CMake configuration variables (e.g., CMAKE_CXX_COMPILER to specify the C++ compiler front end). The Properties > C/C++ Build > Settings tab cannot be used to configure CMake projects.
To watch a video presentation of how to create a project, see Intel® oneAPI Eclipse Samples Plugin.
- Open a terminal session and source setvars.sh.
For root or sudo installations:
. /opt/intel/oneapi/setvars.shFor normal user installations:
. ~/intel/oneapi/setvars.sh - From the same terminal session, launch the copy of Eclipse that you will use to develop oneAPI applications.
- From the top level menu bar, select Intel > Browse Intel Samples. The samples window appears.
NOTE:If you do not see an Intel menu in Eclipse, install the oneAPI Eclipse plugins, then return to this page for instructions on how to Build and Run a sample.
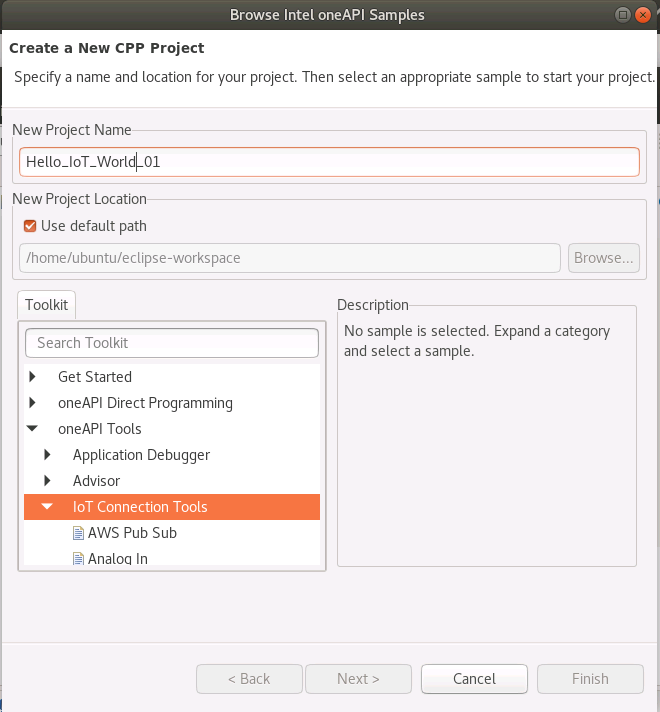
- Click oneAPI Tools.
- Click IoT Connection Tools.
- Click the Hello IoT World sample.
- Click Finish.
- To build the project, first exclude the build folder by right clicking on the build folder and selecting Resource Configurations > Exclude from Build....
- Click Project > Build Project.
- To run the application, click Run > Run.
A "Hello IoT" message appears in the Eclipse console.
Begin debugging the application.
The debugger displays a breakpoint at the start of code.
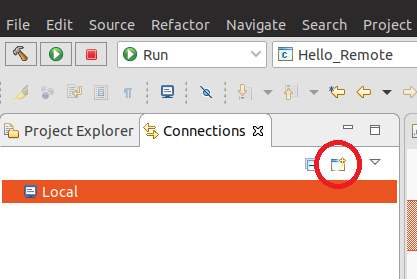
Running a Remote Sample on an Up Squared* Device
Create a Connection within Eclipse by selecting the New Connection option:
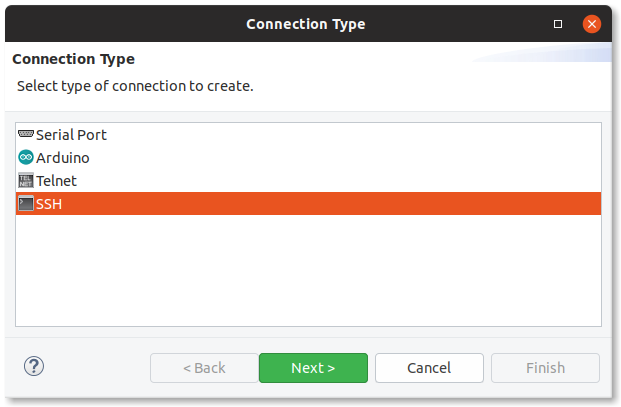
Select the SSH Connection type and click Next:
Enter the Hostname and Username for your remote target. You can either use Key-based authentication or Password, depending on the configuration of the remote device.

You may also be then prompted to set an Eclipse Secure Storage password. This protects the password you entered when stored on the disk. Enter the password and click OK.

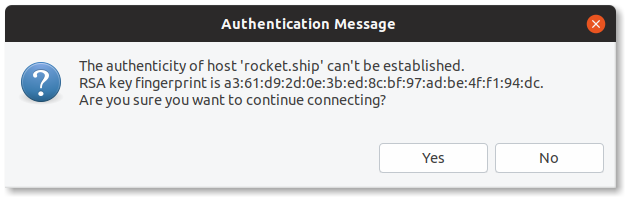
When connecting to the device for the first time, you should be prompted to trust the device. Click Yes to continue.
From the top level menu bar, select Intel > Browse Samples and select the UP Squared Built-in LEDs sample.
In the Project Explorer tree, right-click the Up Squared sample and then select Build Configurations > Build All.
After the build command executes, in the Project Explorer tree, expand Debug to see the binary. Right-click the up2-leds binary, and then select Run Configurations.
The Run Configurations dialog box opens.
To create a remote run configuration, double-click C/C++ Remote Applications to create the new run configuration, then populate the following fields.
NOTE:Some of the fields pre-populate based on your selection of the binary.
- For Connection, choose the new remote connection that you created.
- Choose a path for the binary on the remote UP Squared device (any directory that you can access will work).
- If multiple launchers are available, select the Legacy launcher to continue with SSH.
- Click Apply and then Run.
After the remote application launches, the multi-color LEDs on the UP Squared board blink continuously.
NOTE:A message about authorization on the target device may appear, but authorization may not be required. Allow a few seconds for the application to launch on the target.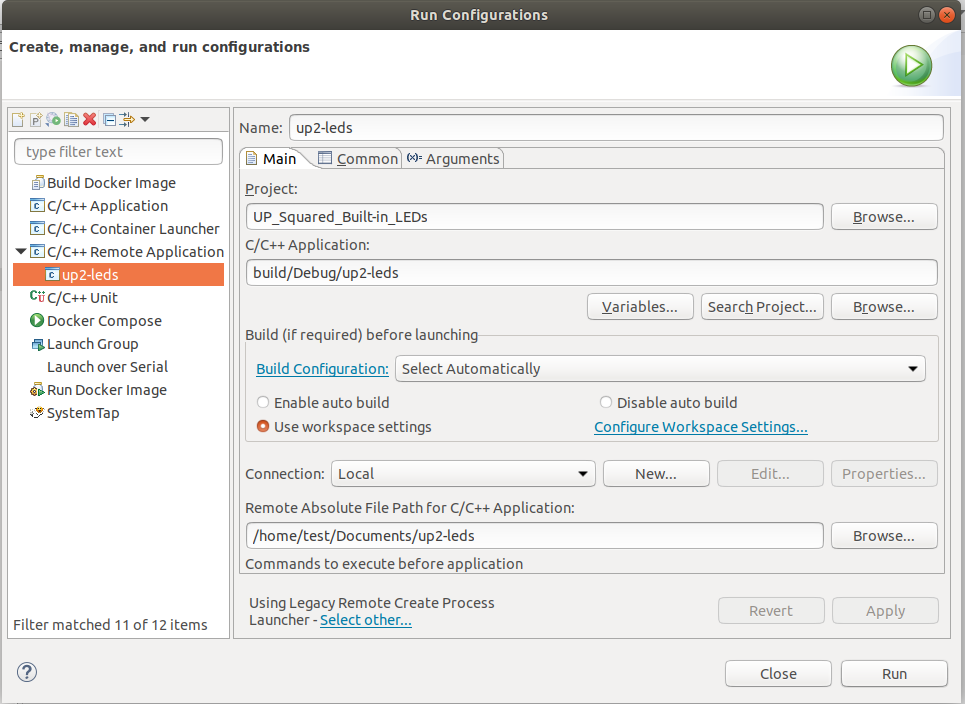
See Explore SYCL* Through Samples to learn more.
Parent topic: Get Started with the Intel® IoT Toolkit for Linux*