The central processing unit (CPU) is a PC’s brain. All of the system’s major components, like the graphics card and RAM, rely on instructions that come from the CPU. A properly functioning processor is a critical part of every gaming PC.
All processors have limits, and it’s normal for high-intensity games and applications to hit those limits without badly impacting performance. However, abnormally high CPU usage can cause the computer to stutter, become unresponsive, or crash.
If your computer seems to overwork its CPU even when high-intensity applications are closed, it may indicate a deeper problem. This can happen for several different reasons, which is why it’s important to learn how to fix high CPU usage in Windows 11.
1. Reboot Your PC
Before trying anything else, try restarting your PC. This piece of classic troubleshooting advice often leads to effective results. A reboot can clear out temporary files and potentially resolve slowdown in long-running processes. If that’s the only problem dragging down CPU performance, rebooting is likely to solve the problem.
2. End or Restart Processes
If rebooting doesn’t reduce abnormally high CPU usage, open the Task Manager. Here, you can track processes that use CPU resources and find out what your computer is actually doing with those resources.
Note that full-screen programs like games will sometimes hide the Task Manager behind their own window). To prevent this, click “Options” in the Task Manager’s top menu bar and select “Always On Top”. If you have a second monitor, you can also just drag the Task Manager window to it.
In the Task Manager, click the Processes tab at the top. Click on More Details at the bottom of this tab to reveal background Windows processes. Look for the “CPU” column near the top of the Processes tab and click it to order by CPU usage:
You can expect high CPU utilization when playing some games, running a video-editing or streaming application, performing an antivirus scan, or juggling many browser tabs. If you’re dealing with this kind of everyday high-CPU usage situation, you should close all background programs and tabs you aren’t using, then return to Task Manager and see if the situation has changed.
High CPU usage while multitasking can be normal. Modern CPUs handle multitasking situations by splitting processes between multiple processor cores, which work through different instruction threads simultaneously.
Intel® Thread Director, a feature introduced in 12th Gen Intel® Core™ processors, optimizes multitasking performance to increase core efficiency and reduce the performance impact of high-intensity applications like games. The latest Intel® Core™ processors also feature Intel® Turbo Boost Technology that helps process heavy workloads by dynamically increasing the frequency of your CPU.
These processor technologies can greatly increase the speed of multitasking with demanding programs, but they don’t prevent abnormal CPU usage situations from occurring. If you see a background process with a name like Runtime Broker, Windows Session Manager, or Cortana at the top of the CPU column when you hit 100% CPU usage, then you have an issue.
These Windows processes should only use a small amount of processing power or memory — 0% or 1% is typical. When your PC is idle, all of these processes together should use less than 10% of your CPU capacity. However, buggy or unexpected behavior — for example, one Windows process trying and retrying to perform a search action that has been disabled elsewhere — can sometimes cause a single process to consume nearly all of your system’s resources.
After you’ve opened Task Manager and found the process unexpectedly using up a large amount of CPU resources, search online to identify it. You don’t want to stop a process like explorer.exe or winlogon.exe , unless you have a good reason. These processes handle graphic elements like the desktop Start menu and assign startup tasks to the PC when it’s turned on.
Once you’ve identified the process as non-critical and checked that you’ve saved whatever you were working on, click on the process to select it, then click End Process at the bottom right of Task Manager. End Process will cause the program to terminate without saving.
If a faulty process was the culprit for high CPU usage, your PC should work smoothly from this point onwards. Many Windows processes simply restart when terminated. This can reset them and prevent the new process from demanding as much CPU power as it was before.
3. Update Drivers
If a process is still using too much CPU, old or suboptimal drivers may be at fault. Drivers are programs that control particular devices connected to your motherboard. Updating your drivers may eliminate compatibility issues or bugs that cause increased CPU usage.
Open the Start menu, then Settings. Click Updates & Security, then the “Check for Updates” button. This will update critical drivers. Graphics card manufacturers also provide utilities (such as NVIDIA GeForce Experience for GPUs) which may improve overall performance when playing games.
Do not use third-party software for updating drivers. You may find companies advertising free driver updates on the Internet. The worst of these install malware on your computer. The best of them are simply redundant because Windows is perfectly capable of updating drivers on its own.
In some rare cases, updating your BIOS version can resolve high CPU usage problems. The BIOS (Basic Input Output System) is motherboard firmware that issues instructions to the computer’s other components during start-up.
On its own, updating the BIOS usually doesn’t lead to performance improvements. It can even introduce new issues that drag down performance, so you should only do this if you’ve identified a bug that causes high CPU usage and found a BIOS update that directly addresses it.
You can update the BIOS automatically with a utility provided by the motherboard manufacturer. You can also update it manually by navigating to the manufacturer’s web page. Look up your motherboard model and BIOS version number, head to the manufacturer’s website, click on “Support”, and click “BIOS” to find relevant updates.
Not sure what motherboard you have? Click the Start button, then type “System Information” and click on this program when it appears:
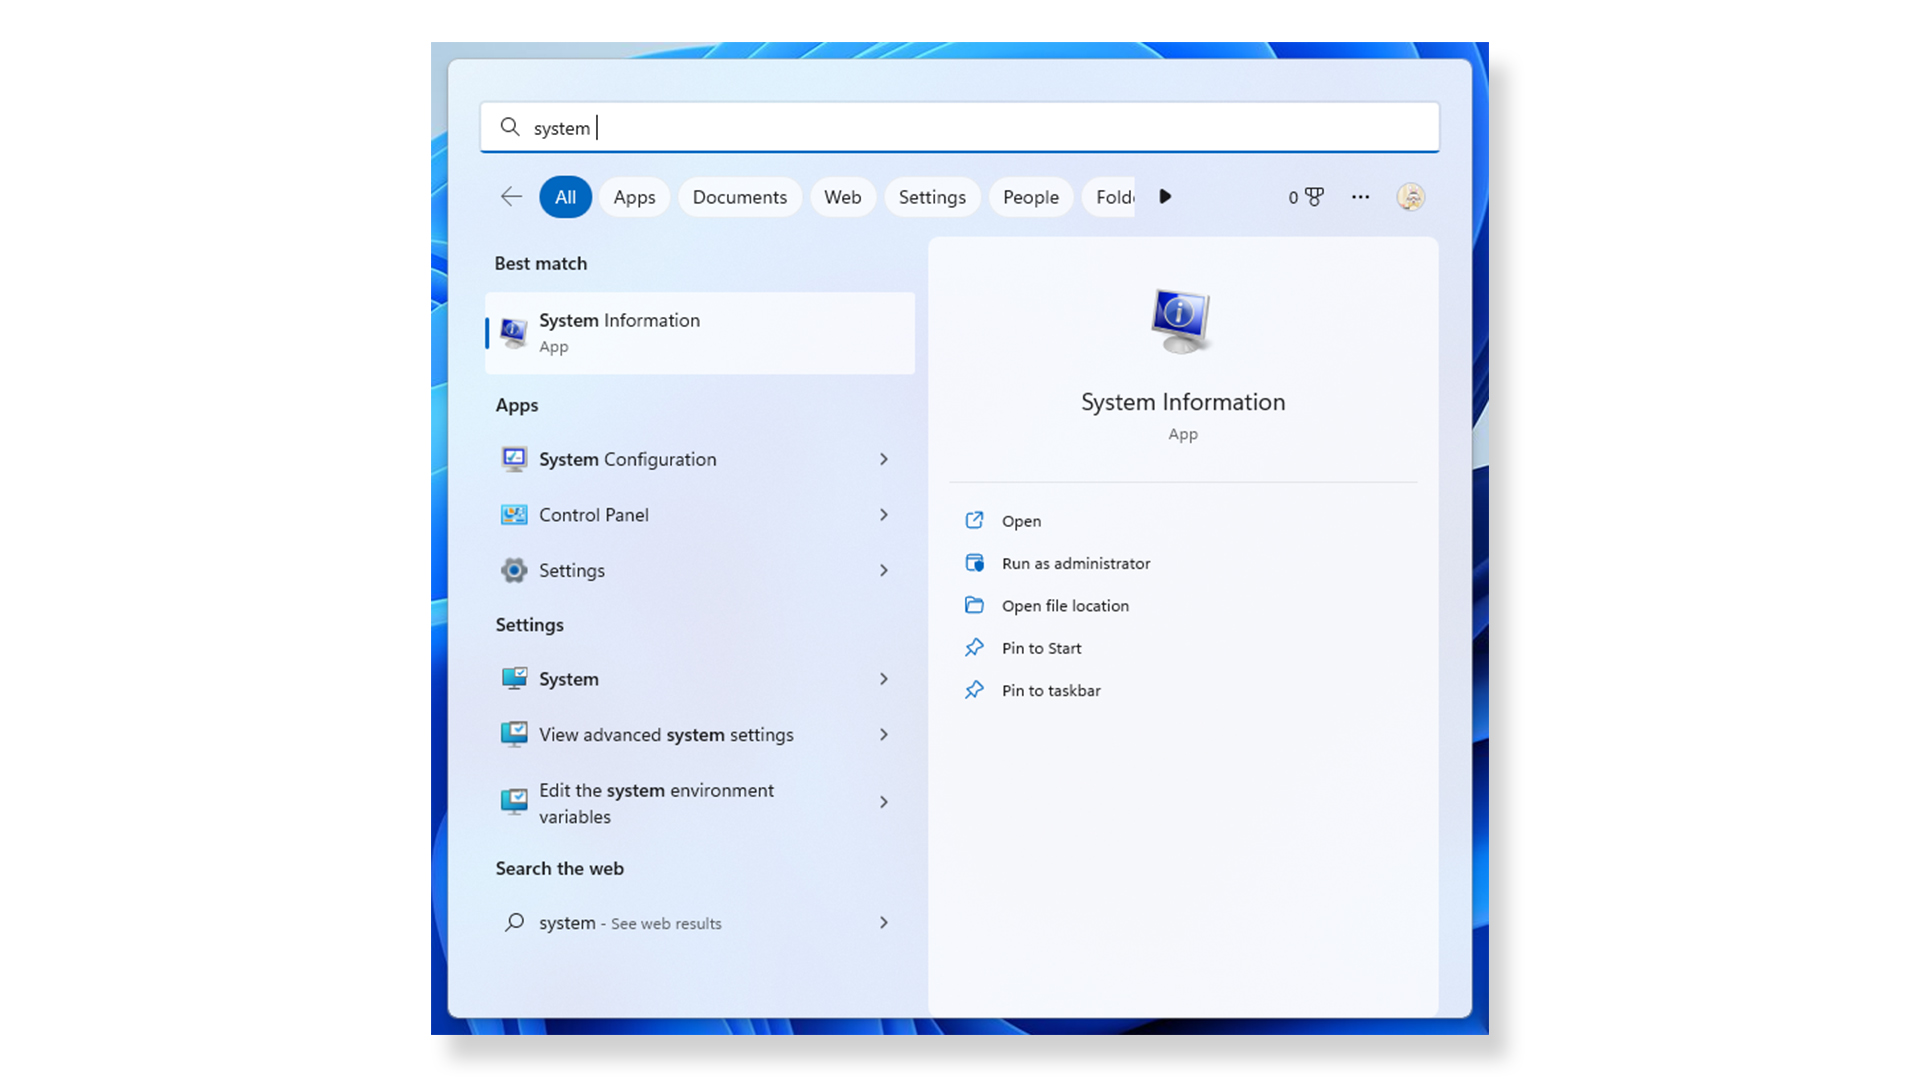
Look at the “System Manufacturer”, “System Model”, and “BIOS Version/Date” fields in the System Information window to find your motherboard. (For example, a Z170X board from GIGABYTE).
Double-check the version number to ensure you’re not already up to date. If you’re not, download and install the new BIOS version, reboot, and check Task Manager again to see if the issue persists.
4. Scan for Malware
If the issue persists, there’s a possibility it’s caused by malware disguising itself as a normal Windows process. Some malicious programs use up CPU and GPU bandwidth for different purposes while appearing in Task Manager under a familiar name like “Cortana.exe” or “Runtime Broker”.
For example, “cryptojacking” software disguises itself as a normal process but actually uses your system’s resources to mine cryptocurrency. This kind of malware can significantly impact CPU performance, since your computer prioritizes illicit cryptocurrency mining operations over your applications and games.
Other forms of malware use compromised system resources for things like breaking passwords and encryption algorithms. These are demanding, high-intensity applications that cybercriminals regularly need, and using your system resources is more profitable than buying their own.
Run a full scan of your system with a reputable antivirus scan to check for this. The free offline security scan provided by Windows Security is a good start, though it’s not guaranteed to catch the latest and most sophisticated attacks.
5. Power Options
Some power settings can throttle the speed of your CPU. Power issues are familiar to laptop users, but they can impact desktop systems too. Check your Power Options by clicking the start menu and typing “Edit Power Plan”. Once open, click “Power Options” in the address bar at the top of the window. You should see this screen:
Click “Show additional plans”, then enable a non-power saver plan.
Now you can open Task Manager again to see if CPU usage returns to normal.
6. Find Specific Guidance Online
If you are still experiencing abnormally high CPU usage, it may be due to third-party applications or processes consuming more resources than they should. Since these processes come from sources outside your operating system, there is no one-size-fits-all solution for addressing their issues. You will need to seek advice from the developer responsible for creating the application running the process.
To do this, get the name of the process from the Processes tab of Task Manager, and search online for support threads on the topic.
If you don’t see results from your initial query, add in any specific information that might help, such as the model of your processor and the names of other programs associated with the issue. It’s rare to find a bug that hasn’t already been discussed in hardware and gaming forums, so take the time to try a few variations on your search.
You may find recommendations to disable services using the Windows Registry database. This is usually a temporary workaround, but it can be worth trying if a permanent fix isn’t available.
Before making any changes to the registry, it’s vital to create a restore point. This will save your computer’s current systems settings and allow you to restore them if your Registry edits unintentionally impact system stability. To create a restore point, click Start, then type “Create a restore point”. You’ll then need to select your hard drive and click “Configure”.
 Select “Turn on system protection” within the System Protection screen and choose how much disk space you’d like to allocate. System Restore must use at least 1GB, but can be set to use as little as 1% of larger drives. However, allocating more disk space lets Windows create more restore points before deleting old ones.
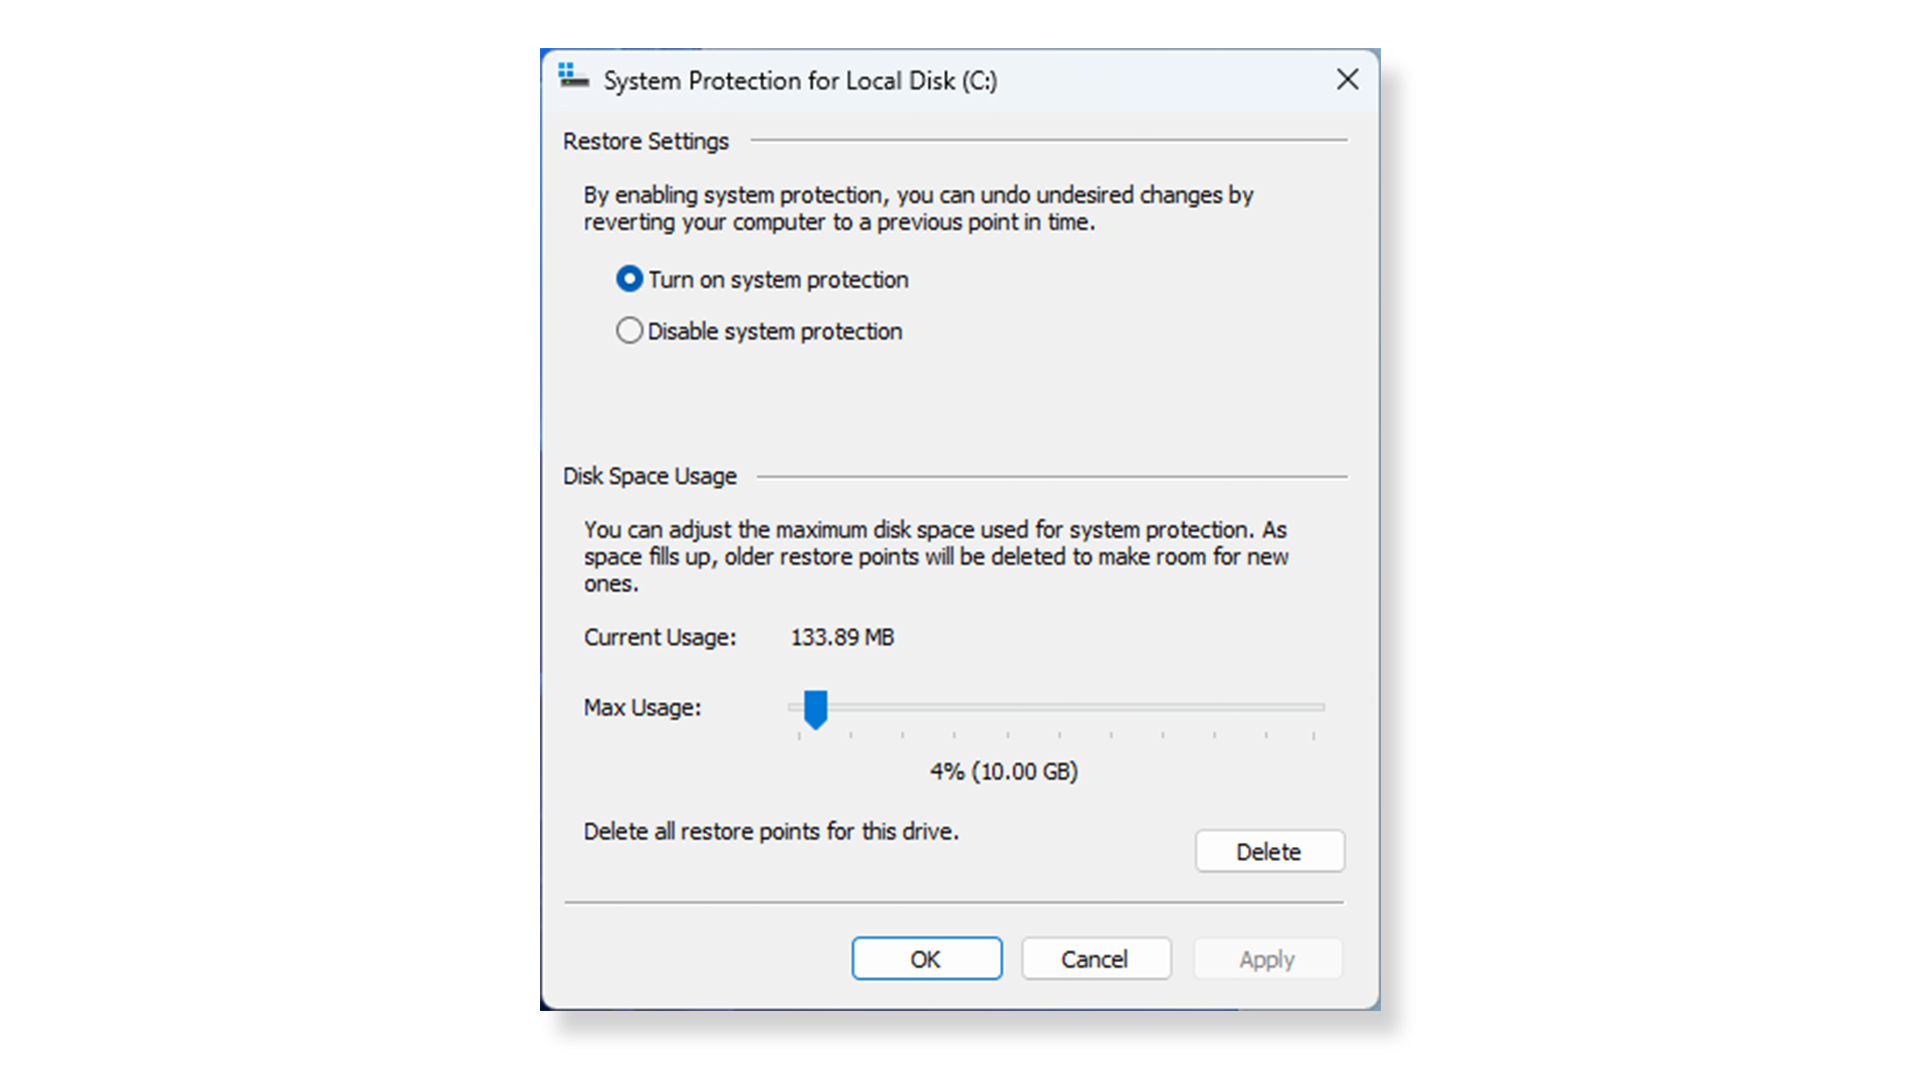
After you click Apply, return to the previous screen and press the “Create” button to set a restore point.
The following steps will vary depending on the affected process. Remember that if you’re making any major changes to Windows based on online advice, you should always create a restore point first.
7. Reinstalling Windows
If you have a restore point from before the time your CPU issues began, try restoring from that point. If this is not the case, you can try to reinstall Windows to reset the system and resolve high CPU usage. This can be a long process, but it can potentially resolve CPU usage issues caused by software.
Reinstalling Windows will delete all of your installed applications. You have the option to keep your files, though. It’s not likely that an individual file is responsible for high CPU usage, so you don’t have to let Windows delete them all. However, backing up these files on an external drive or cloud service is a good idea, just in case.
When you’re ready to begin, click the Start button and type “Reset this PC”. Then click “Get Started”.
The process may take an hour or more. When it finishes, you will need to reinstall the games and applications you use.
Other Programs
CPU-Z is a reliable tool for checking general information about your CPU and motherboard. It shows the exact model numbers of your CPU and motherboard as well as performance information. You can use those model numbers to search online for support threads related to CPU usage.
Task Manager isn’t the only way to see what background processes are doing. Process Monitor logs not just CPU usage, but also registry, file system, and network activity. Check network activity using this tool if you suspect that a process could be malware.
Similarly, Performance Monitor is a built-in Windows tool that gives you a more detailed view of a process’s CPU usage over time. To open it, use the Windows Key + R, then type “perfmon”.
Performance Monitor has too many advanced features to describe here. Its primary function is breaking CPU usage into multiple categories per process and tracking it over time for advanced troubleshooting.
Find More Ways to Boost Your CPU
CPUs are designed to run safely at 100% CPU utilization. However, these situations can also impact the performance of high-intensity games and applications. Learning how to fix high CPU usage can resolve some of the most common problems.
However, not all CPU issues require software fixes. Your CPU may simply be unable to keep up with the games or applications you’re asking it to run.
This means it may be time for an upgrade. The latest Intel® CPUs deliver performance boosts for gamers and creative professionals alike.